


|
To contact us:
|
|
Phone: |
|
1933 E. Dublin-Granville Road #294 Columbus, OH 43229
|
|
Serving Central Ohio Delaware, Franklin, Licking Counties Columbus, Dublin, Delaware Gahanna, Granville, Lewis Center, New Albany, Newark & Powell |
|
|

|
614.865.9370
|
|
"Workmanship That Stands The Test of Time" |
|
877.217.7840 |

|
Our Performance guarantee |
|
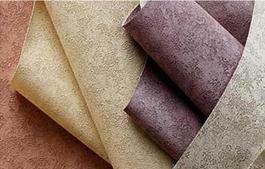
You expect top quality for your decorating investment. Your new wallcoverings should look great and give years of satisfaction. Only by following the wallcovering manufacturer's specifications do you receive their warranty and Regency Wallcraft's exclusive Performance Guarantee.
Step 1: Proper Surface Preparation
- Remove old wallcovering completely including old adhesive that may stain new paper. - Patch rough spots that would show through after your wallcovering dries. - Scrap entire wall to remove surface imperfections that may "telegraph" through new wallcovering. - Size surface with a true wallcovering primer. Installing over regular wall paint, flat or glossy, is the #1 cause of adhesion and removal problems.
Step 2: Select the Right Adhesive
- There are six different wallcovering adhesives. Wheat, cellulose, clear, clay, vinyl-over-vinyl and prepasted activator. Your wallcovering manufacturer specifies the correct choice. Using the wrong adhesive may cause staining, seam curling and shrinkage.
Step 3: Proper Clean Up
- Wash each strip of wallcovering completely. - Wash at the ceiling line and all woodwork. - Adhesive residue causes wall and ceiling paint failure and discolors your new wallcovering.
These are important steps in receiving full value for your investment. Any proposal should include all these procedures. However, your most important decision will be the selection of your wallcovering installer - a professional who will follow these procedures and put it in writing. If it isn't in writing, chances are you have no guarantee. |
|
Jim Turner of Regency Wallcraft is an industry recognized authority on the preparation, installation and removal of wallcoverings. |
|
Central Ohio BBB Integrity Award |